Secure IoT With SSH: Your Ultimate Remote Access Guide!
In an increasingly interconnected world, where our homes, businesses, and even cities are becoming smart, have you ever considered the inherent vulnerabilities of your Internet of Things (IoT) devices? Securing your IoT ecosystem through secure remote access isn't just a good practice; it's a necessity.
As the number of connected devices explodes, so too does the potential for cyber threats. From your smart thermostat to your industrial sensors, each device represents a potential entry point for malicious actors. The need for robust security measures has never been more critical, and thats where Secure Shell (SSH) comes into play.
SSH, or Secure Shell, is a cryptographic network protocol that provides a secure channel over an unsecured network. It is primarily used for remote login, but it also enables secure file transfer and port forwarding. Its key features include authentication, encryption, and integrity verification, making it an ideal choice for remote IoT device management, where security is paramount. This tutorial provides a comprehensive guide to understanding and implementing SSH for securing your IoT devices.
Understanding the Fundamentals of SSH
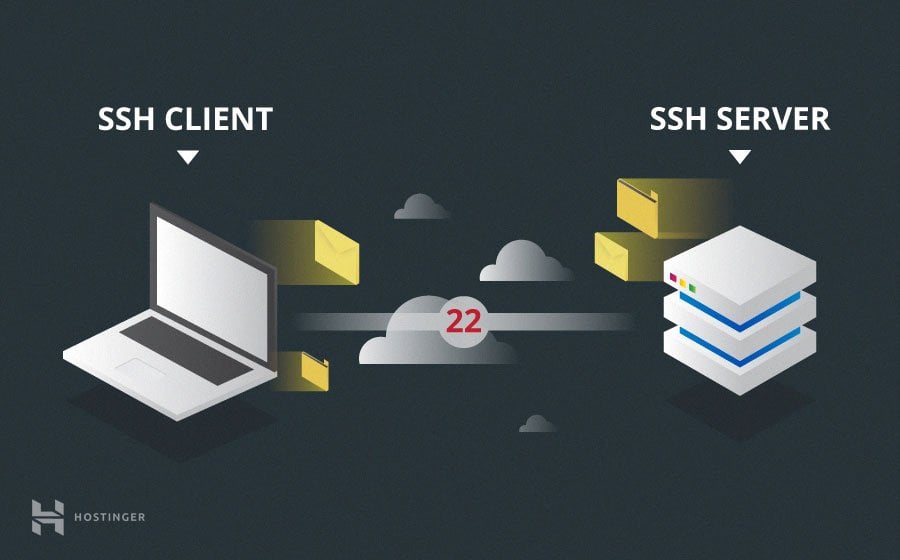
SSH operates on a client-server model. The client initiates the connection, and the server responds. When you connect to an IoT device via SSH, your computer (the client) connects to the device (the server). This connection is established through a secure, encrypted channel, protecting the data exchanged from eavesdropping and tampering. The process begins with the client and server negotiating a secure connection, usually through key exchange, to establish the encryption keys that will be used for the communication. Authentication then verifies the identity of the client, ensuring that only authorized users can access the device. This involves the use of passwords, cryptographic keys, or multi-factor authentication. Once authenticated, the client can send commands and receive data from the server, all encrypted to protect against interception. This secure channel also facilitates secure file transfer and port forwarding, extending its utility beyond simple remote login.
The Importance of SSH in the IoT Landscape
The proliferation of IoT devices has created a vast attack surface. With devices often deployed in remote locations, direct physical access for maintenance and management is not always feasible. This is where SSH becomes invaluable. It allows for remote access, enabling administrators and authorized users to manage devices securely, troubleshoot issues, and deploy updates from a distance. SSH's strong encryption and authentication mechanisms ensure that only authorized users can access the device, mitigating the risk of unauthorized access and data breaches. Moreover, SSH simplifies the process of managing IoT devices from afar, improving efficiency and reducing the need for on-site visits.
Setting Up SSH on Your IoT Devices: A Step-by-Step Guide
Before you can access your IoT devices remotely via SSH, you need to ensure that SSH is installed and configured properly. The specific steps for setting up SSH vary depending on the operating system of your IoT device. However, the general process involves the following steps:
- Installation: The first step is to install the SSH server software on your IoT device. Most Linux-based devices, such as those running Raspberry Pi OS, typically include an SSH server (OpenSSH) by default. If its not installed, you can install it using the package manager specific to your operating system. For example, on Debian/Ubuntu-based systems, you would use the command `sudo apt-get install openssh-server`.
- Configuration: After installation, you'll need to configure the SSH server. This involves setting up the network interface the device will use, determining the ports on which it will listen (the default is port 22), and configuring authentication methods. It is crucial to strengthen the security settings by, among other things, changing the default port number and disabling password-based authentication in favor of SSH keys. In the configuration file, generally located at `/etc/ssh/sshd_config`, you may set these options.
- Firewall configuration: You must set up your firewall to allow incoming SSH traffic on the specified port to complete the configuration process. This ensures that the SSH traffic can reach the device. This setup varies depending on your firewall software, but generally involves opening the configured port.
- User account creation: Create a user account on the device with appropriate permissions for remote access. Set up a strong password for the user account, or, preferably, configure SSH key-based authentication.
- SSH key generation: Key-based authentication is far more secure than password authentication. To set it up, generate an SSH key pair on your client machine. This will create a private key (which you keep secret) and a public key (which you will put on your device).
- Public key deployment: Copy the public key to your IoT device in the authorized_keys file, usually found in the .ssh directory of the user's home directory. This allows the SSH server to verify your client's identity.
- Testing the connection: Finally, test your SSH connection using an SSH client, such as the `ssh` command-line tool on Linux and macOS or a program like PuTTY on Windows. Use the command `ssh username@device_ip_address` (replace `username` with the user account name and `device_ip_address` with the IP address of your IoT device).
Advanced Configuration and Best Practices
Once the basic setup is complete, consider these advanced configurations and best practices to maximize the security and effectiveness of your SSH connections:
- Disable Password Authentication: Enable SSH key-based authentication and disable password authentication in the SSH configuration file (`/etc/ssh/sshd_config`). This will significantly reduce the risk of brute-force attacks. Look for the `PasswordAuthentication` directive. Set its value to `no`.
- Change the Default SSH Port: Changing the default SSH port (port 22) can help to reduce the number of automated attacks on your device. Choose a high-numbered port (e.g., above 10000) and configure your firewall to allow traffic on that port. This can be done in the SSH configuration file using the `Port` directive.
- Regularly Update SSH Software: Keep your SSH server software up to date by installing security patches and updates as soon as they are released. This will help to protect your device from known vulnerabilities.
- Use Firewalls: Implement a firewall on your IoT device to restrict network access. Only allow SSH traffic from trusted IP addresses or networks.
- SSH Tunnels: Use SSH tunnels to securely transfer data between devices and forward traffic from one port to another securely. SSH tunnels can be used for a variety of purposes, including creating secure connections to internal networks.
- Two-Factor Authentication: For added security, consider implementing two-factor authentication (2FA) for SSH access. 2FA requires a second form of verification, such as a code from a mobile app, in addition to your password or SSH key.
- Protect Private Keys: Add an extra layer of security by protecting your private key with a passphrase. This will prevent unauthorized access to your device, even if your private key is compromised.
- Monitoring and Logging: Implement monitoring and logging to track SSH connections and detect any suspicious activity. Regularly review the SSH logs for failed login attempts and other unusual events.
Troubleshooting Common SSH Issues
Even with proper configuration, you may encounter issues when trying to connect to your IoT device via SSH. Here are some common problems and how to solve them:
- Connection Refused: This usually means that the SSH server is not running on the device or that a firewall is blocking the connection. Make sure the SSH service is running on the device and that your firewall allows SSH traffic (port 22 by default or the port you configured).
- Authentication Failures: If you're using SSH keys, make sure that the public key is correctly added to the `authorized_keys` file on the IoT device. If you're using a password, make sure you're entering the correct password. Double-check for typos.
- Network Connectivity Issues: Ensure that your client machine and the IoT device are on the same network or that you have proper routing configured if they are on different networks. Check your network connection settings.
- Incorrect IP Address: Make sure you're using the correct IP address to connect to the IoT device. The IP address might have changed, or there may be a typing error.
- Permissions Issues: The user you are trying to log in with may not have sufficient permissions. Ensure that the user account has the necessary permissions to access the device.
- Firewall Blocking SSH Traffic: Verify that your firewall isn't blocking SSH traffic. If you're using a firewall on the IoT device or the network, ensure that it's configured to allow inbound SSH traffic.
- SSH Service Not Running: Restart the SSH service on your device to see if that resolves the issue. This can be done using the command `sudo service ssh restart` on many Linux systems.
Practical Applications of SSH in IoT
SSHs capabilities extend beyond mere remote access; it serves as a cornerstone for versatile IoT device management.
- Remote Device Management: SSH simplifies the management of IoT devices from afar. You can update software, configure settings, and troubleshoot issues without physical access. Whether you're troubleshooting issues, deploying updates, or simply monitoring system performance, a reliable SSH server is indispensable.
- Data Transfer and Secure Communication: SSH tunnels enable secure data transfer between devices. By setting up a tunnel, you can securely forward data from one port to another, ensuring that data transmissions are encrypted and protected from interception.
- File Transfers: SSH provides a secure method for transferring files to and from IoT devices.
- Automated Tasks: SSH facilitates the automation of tasks on IoT devices. You can write scripts to automate configuration changes, software updates, and other maintenance operations.
- Remote Monitoring: SSH allows remote monitoring of system performance. You can use commands to collect data on CPU usage, memory usage, and other critical metrics.
SSH and the AWS IoT Platform: An Example
Cloud platforms, such as Amazon Web Services (AWS), often provide tools to enable secure remote access to IoT devices. For example, the AWS IoT platform allows you to establish secure tunnels that provide access to your devices. The tutorials in this section focus on creating a tunnel using the AWS Management Console and the AWS IoT API Reference. In the AWS IoT console, you can create a tunnel from the tunnels hub page or from the details page of a thing that you created. This allows you to securely connect to and manage devices that are connected to AWS IoT.
The Manual Setup Method for AWS IoT Tunnels
If you prefer a manual setup, AWS provides detailed instructions. Heres a breakdown of the essential steps:
- Prerequisites: Ensure you have the necessary tools, including the AWS CLI (Command Line Interface) and the AWS IoT Core developer guide.
- Open a Tunnel: Using the AWS IoT API, open a secure tunnel to your device. This creates a secure, encrypted connection.
- Resend Tunnel Access Tokens: Retrieve the tunnel access tokens. These are required for establishing the connection with your local proxy.
- Configure and Start the Local Proxy: The local proxy acts as an intermediary, handling the communication between your client and the IoT device.
- Start an SSH Session: Once the local proxy is running, you can initiate an SSH session to the device via the tunnel.
- Cleaning Up: After you're done, remember to close the tunnel.
Securing SSH Connections: Going Beyond the Basics
While the fundamental steps of setting up SSH are essential, there are advanced techniques to further fortify your connection. Consider these additional practices:
- SSH Key Management: Implement a robust key management system to generate, store, and rotate SSH keys securely. Consider the use of a dedicated key management server.
- Intrusion Detection: Integrate intrusion detection systems (IDS) to monitor for suspicious activity and automatically block malicious IP addresses.
- Regular Audits: Conduct regular security audits of your SSH configurations. This includes reviewing access logs, testing security configurations, and identifying potential vulnerabilities.
- Network Segmentation: If possible, segment your network to isolate your IoT devices from other parts of your network. This limits the impact of a potential security breach.
Understanding the "Remote SSH IoT Behind Router" Scenario
Many IoT devices are deployed behind routers, which provide an extra layer of security, but also present challenges for remote access. To remotely access a device behind a router via SSH, you must consider the following.
- Port Forwarding: This is a crucial step. You need to configure port forwarding on your router. This tells the router to forward incoming SSH traffic on a specific port to the internal IP address and port of your IoT device.
- Static IP Address: It is highly recommended to assign a static IP address to your IoT device. Dynamic IP addresses can change, making it difficult to maintain a consistent SSH connection.
- External IP Address: You will need the external IP address of your router to connect to your IoT device from outside your local network.
- Security Considerations: Carefully consider the security implications. Port forwarding opens a port on your router, making it accessible from the internet. Ensure you have strong passwords, and consider using SSH keys and other security measures to protect your device.
The Future of SSH in IoT
As IoT technology advances, so too will the methods for securing these devices. SSH remains a critical component of any comprehensive security strategy. Future advancements may include:
- Automated Security Management: Tools that automate the configuration and maintenance of SSH settings, including key rotation, vulnerability scanning, and intrusion detection.
- Integration with Cloud Platforms: More seamless integration with cloud-based IoT platforms.
- Improved User Experience: Enhancements to make SSH more user-friendly, simplifying complex configurations.
- Hardware-based Security: The integration of hardware security modules (HSMs) to secure SSH keys and further protect against unauthorized access.
Remote IoT device management not only ensures secure communication but also simplifies the process of managing IoT devices from afar. Whether you're a network administrator, developer, or hobbyist, understanding how to securely connect to a remote IoT device via SSH is crucial. As we delve deeper into this remote SSH IoT behind router tutorial, you'll discover not only the technical aspects of setting up secure connections but also best practices for maintaining.
Conclusion: The Power of Secure Remote Access
Ssh isnt just about typing random commands into your terminal. Its about securing your devices, ensuring privacy, and giving you the power to control your tech world from anywhere. By now, you should have a solid understanding of how to set up and manage your IoT devices remotely using ssh. Knowledge is power, but action is king. Now, take action: set up SSH, secure your devices, and explore the possibilities of remote IoT management. Whether you're a network administrator, developer, or hobbyist, understanding how to securely connect to a remote IoT device via SSH is crucial. As we delve deeper into this remote SSH IoT behind router tutorial, you'll discover not only the technical aspects of setting up secure connections but also best practices for maintaining.So, buckle up, because were about to embark on an adventure into the world of remote iot management.


